
Last Updated on May 16, 2026 by Mr.Feng
This article is part of Experiment #001. Once I had an offer selected, I needed a repeatable process to go from zero to a live Google Ad as fast as possible. This is the exact 7-step workflow I built and now use every time I test a new affiliate offer. It covers domain, hosting, email, landing page, analytics, and campaign setup — start to finish.
When I’m testing a single page affiliate site with Google Ads, the fastest way for me to evaluate an affiliate e-commerce product is to quickly set up a Google Ads campaign. This allows me to see whether the product actually has real search demand and, ultimately, whether there’s a viable market for it.
After going through the process over and over: registering domains, setting up Cloudflare, creating domain-based email addresses, setting up hosting, installing WordPress, designing landing pages, and launching campaigns. I’ve developed a workflow that takes me from zero to a live Google ad in about 30 minutes. This is my personal experience. It might not be the most optimal way, but I’m very familiar with every step, and it’s become my standard operating procedure. I’m sharing it here as my firsthand method.
What tools are i needed?
| Tools I Use | Tool / Service |
|---|---|
| Domain and hosting | Namecheap |
| DNS & Reverse Proxy (CDN) | Cloudflare |
| AI design tool | ChatGPT |
| Ads Platform | Google Ads |
| Analytics & Tracking | Google Analytics (GA4) |
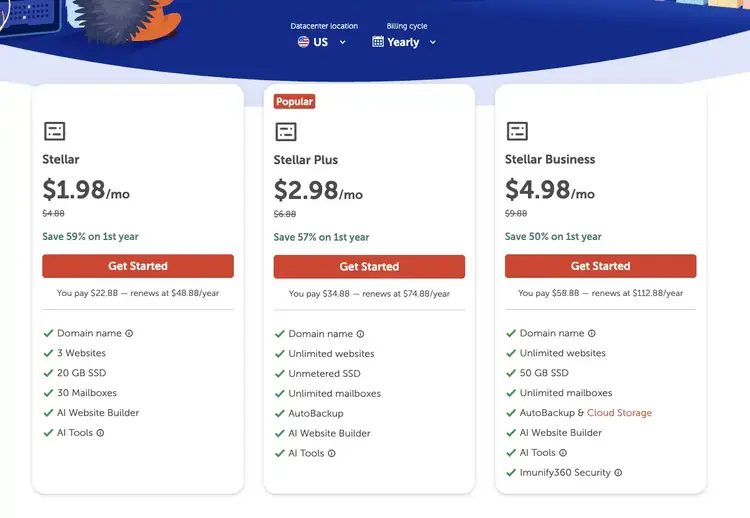
The hosting plan I use on Namecheap is Stellar Plus, which is a shared hosting plan. It’s not the top-tier option, but it fits my needs well. What I value most is that it allows unlimited websites, unlimited storage, and unlimited email accounts. The price is reasonable too, so I’ve stuck with this plan.
My Step-by-Step Process
Step 1: Choosing an Offer to Test
The first step is finding affiliate offers that are practical to test. I focus mainly on recurring SaaS affiliate programs because a single customer acquisition can lead to long-term revenue.
There are several ways to find these opportunities, including browsing new product launches on Product Hunt, signing up for SaaS affiliate networks, and looking for affiliate programs through software footprint research. If you are just getting started, beginner-friendly SaaS affiliate programs that do not require a website or traffic proof can be a good place to begin.
After building a larger database of SaaS affiliate programs, I am now exploring a more multi-dimensional, multi-step approach to evaluating whether these offers are suitable for Google Ads testing, instead of relying on the scoring system I previously designed.
Step 2: Registering a Domain
If you’re already familiar with domain registration on Namecheap and setting up Cloudflare DNS, you can skip directly to Step 4.
The reason I’ve written out Step 2 and Step 3 in full detail is that during testing, I’ve found that after some time, I tend to forget these steps. So I documented the most stable and fastest testing SOP I currently use, making it easy for me to reference anytime.
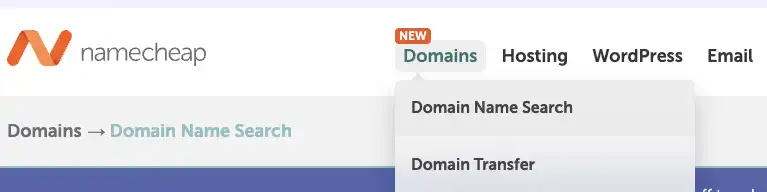
First, I go to the Namecheap website, log into my account, and select Domains → Domain Name Search.
Here, I choose the domain name I want to register and check whether it’s available.
For most domains I register, I’ll give the offer to ChatGPT and have it suggest 10 domain name options for me to choose from.
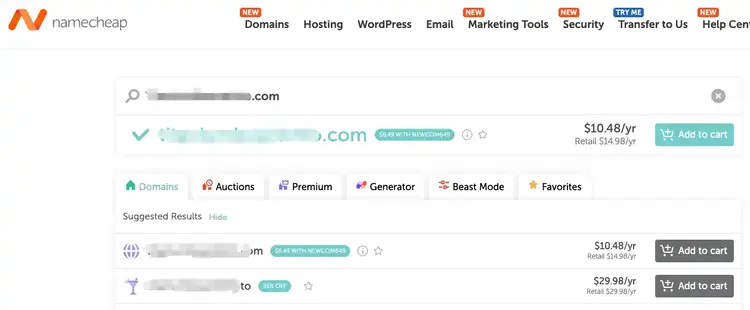
Click “Add to Cart”, complete the payment, and the domain is successfully registered.
Step 3: Set Up Cloudflare
After registering the domain, I first connect it to Cloudflare DNS to create a unified and stable testing environment.
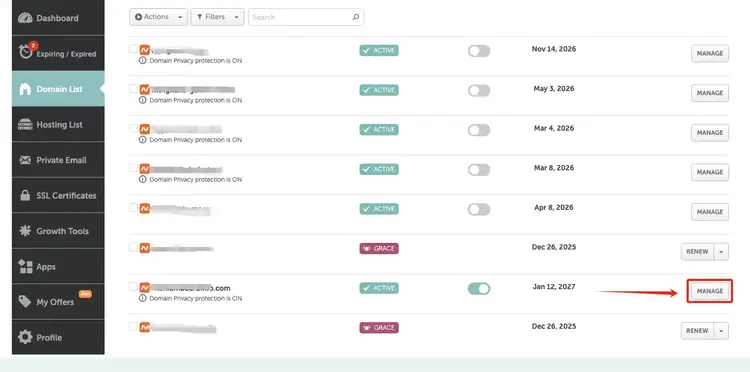
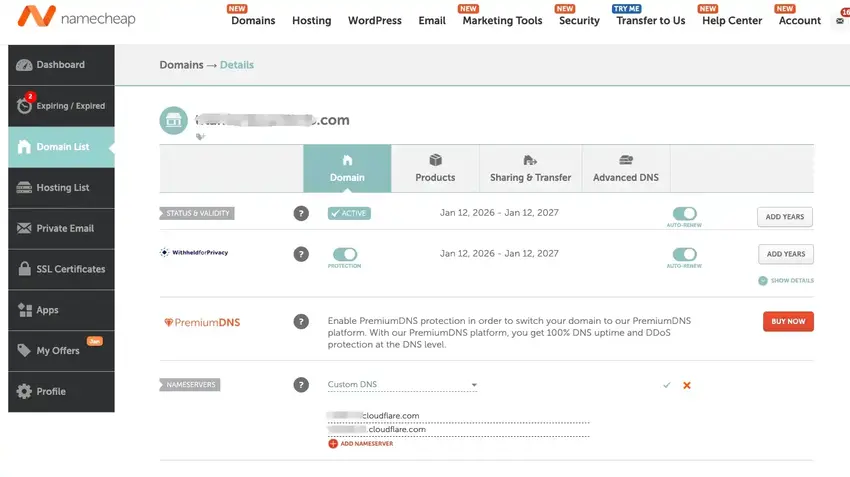
In Namecheap, open “Domain List” from the left-hand menu.
On the right, find the domain you just registered and click “Manage” next to it.
In “Details” under Nameservers, select Custom DNS.
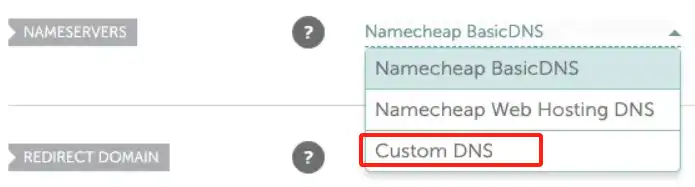
I need to enter 2 lines of DNS here, which should be your Cloudflare DNS. So first, I open my Cloudflare account and find the DNS corresponding to my Cloudflare account.
Click “Log In” in the top-right corner. If you don’t have a Cloudflare account, you can click “Start for Free” in the middle of the page and follow the prompts to register. Since I’ve had a Cloudflare account for a long time, I won’t go into that—registration is very straightforward.
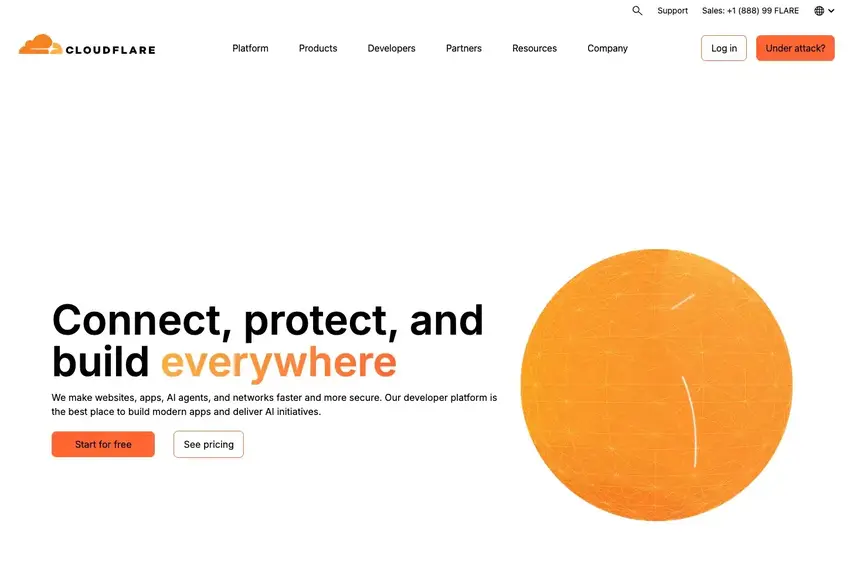
Once I’m logged in, I click “Onboard a Domain” in the middle of the page.
Under Enter an Existing Domain on the page, I enter the new domain I registered in Namecheap and keep Quick Scan for DNS Records selected.
Then, under Control How AI Crawlers Access Your Site, I choose “Do Not Block (Allow Crawlers)”.
I do not enable “Instruct AI Bot Traffic with robots.txt.”
My understanding of this step is that it controls whether the site’s content is open to AI access. I found that if I select “Block on All Pages” or enable “Instruct AI Bot Traffic with robots.txt,” Cloudflare automatically adds a lot of AI-related code to the robots.txt file that I cannot remove.
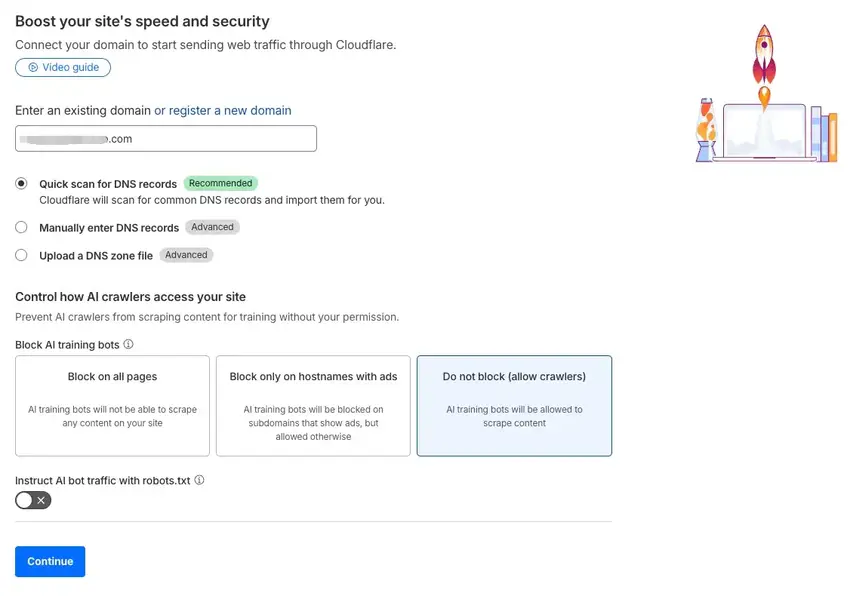
Then, I click “Continue”.
Then, I select “Free”. I’ve always used the free plan, and it’s more than enough.
If I start making money in the future, I’ll definitely upgrade to a paid plan. ^_^
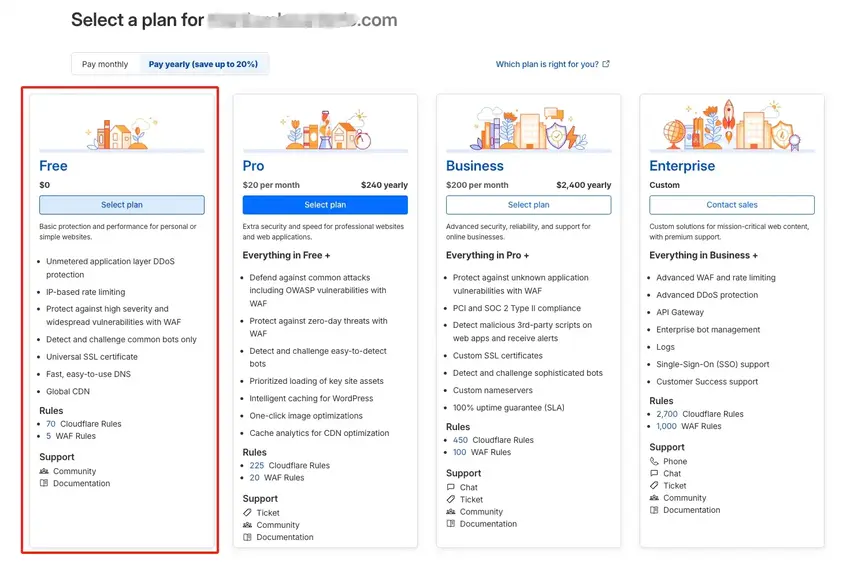
Then, I click “Continue to Activation.”
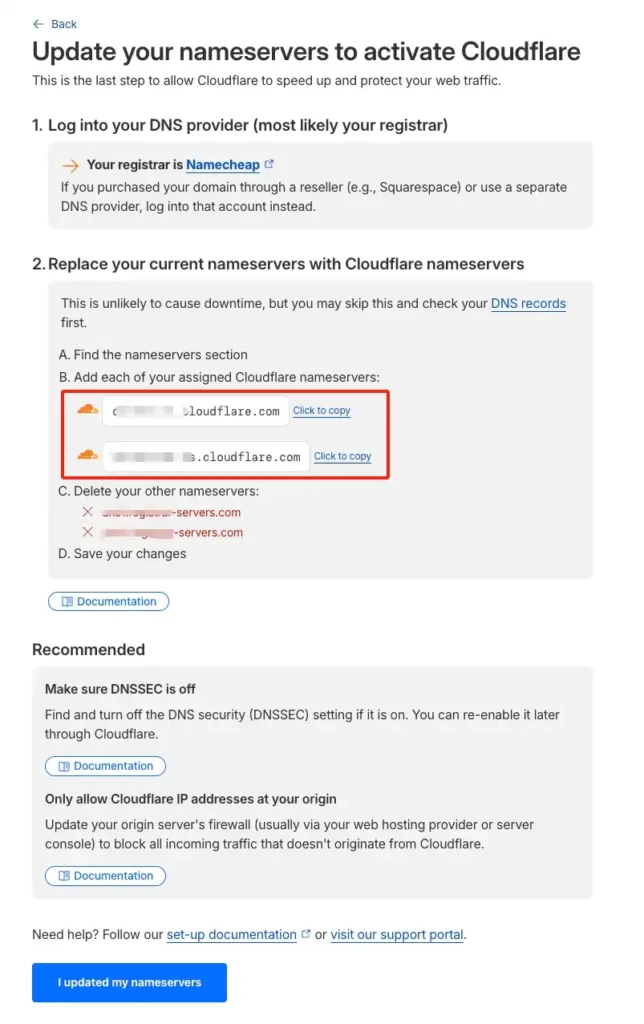
Then, I find the Nameservers for my Cloudflare account and enter these two lines into the Details of the corresponding domain in Namecheap’s Domain List, just like in the image. After that, I click the checkmark next to it.
Then I go back to Cloudflare and click “I Updated My Nameservers” at the bottom.
Finally, I see the message in Cloudflare: “Your domain is now protected by Cloudflare,” which indicates that this step is complete.
Step 4: Set Up a Domain-Based Email
After my first test failed and some research, I realized that a landing page should include at least a few basic elements—these are the minimum requirements; otherwise, it basically won’t pass Google’s review. I’ll share the details of these minimum requirements for Google approval in another article.
One important factor is the Contact Us section, especially the email. Based on my research, if you leave a Gmail address, Google considers it less safe than an email ending with your own domain. So every time I register a domain, I set up at least one domain-based email to use as the contact email on my landing page.
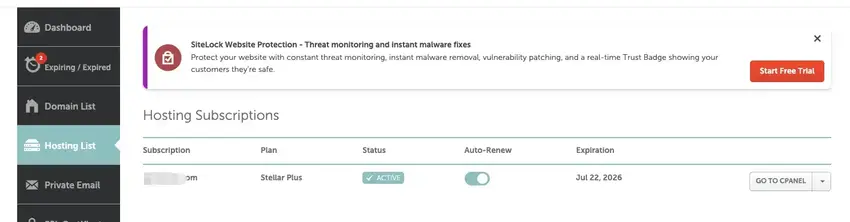
So first, I go to the Hosting List, find the Stellar Plus plan I registered, and click “Go to cPanel” next to it.
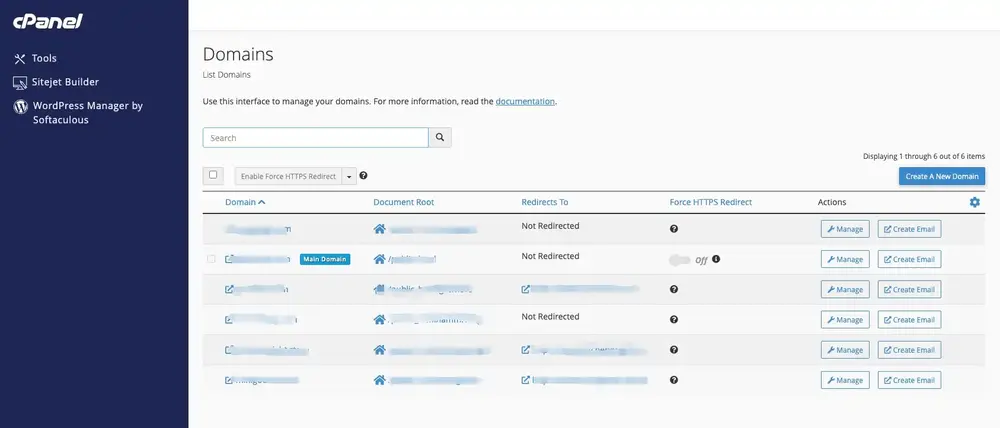
In cPanel, I click “Domains.”
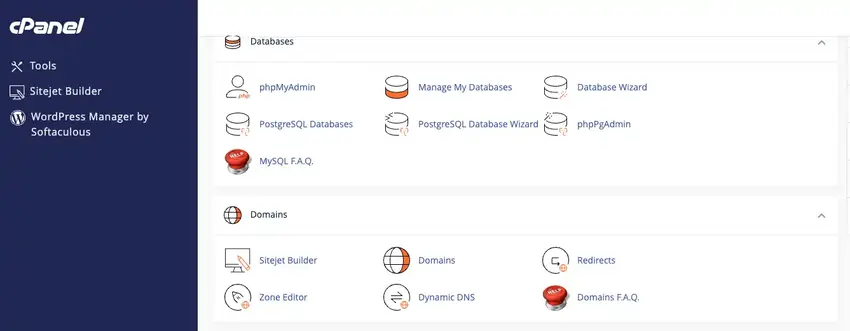
Then, I click “Create a New Domain.”
Under Domain, I enter the domain I just registered, and I do not check “Share Document Root (File System Location)”.
In the Subdomain field, it’s usually set automatically to your domain. I usually remove the domain extension (like .com) and keep only the middle part of the domain. I follow this same method every time I set it up.
Then, I click “Submit.”
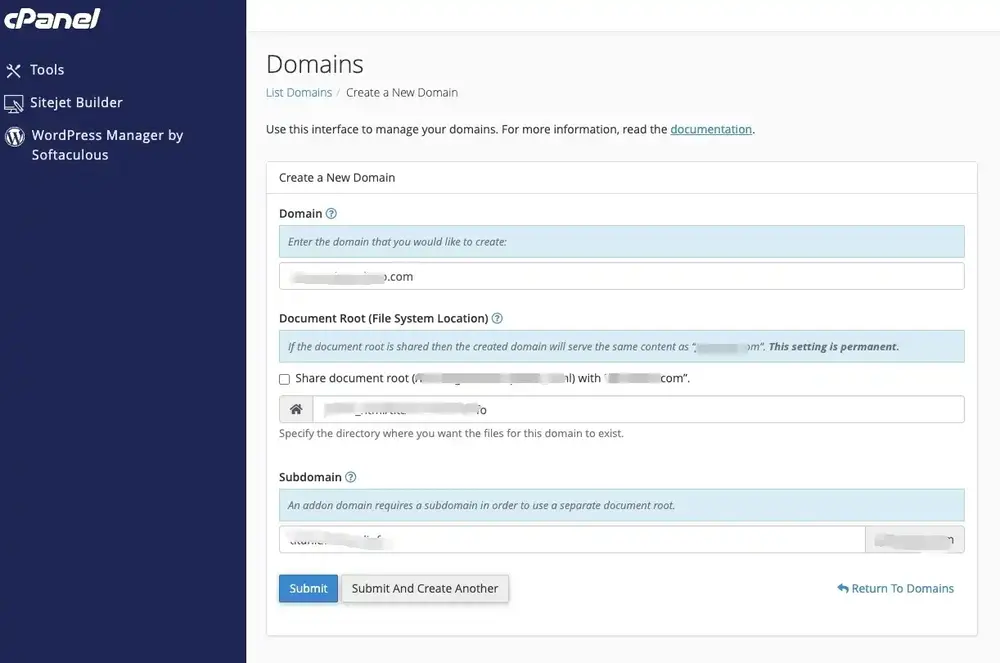
The Document Root is the path for the website. I always put it under public_html. If I frequently create different websites, keeping them all under public_html makes management easier.
Technically, it could also be placed directly in the root directory without using public_html.
Then, I go back to the Domains List I just opened and click “Create Email” next to the corresponding domain.
I usually standardize the email username as “support” to make it look more professional. Since I’m testing whether the offers can convert, I want the email to feel like a professional customer support address.
After setting the password, I click “Create.”
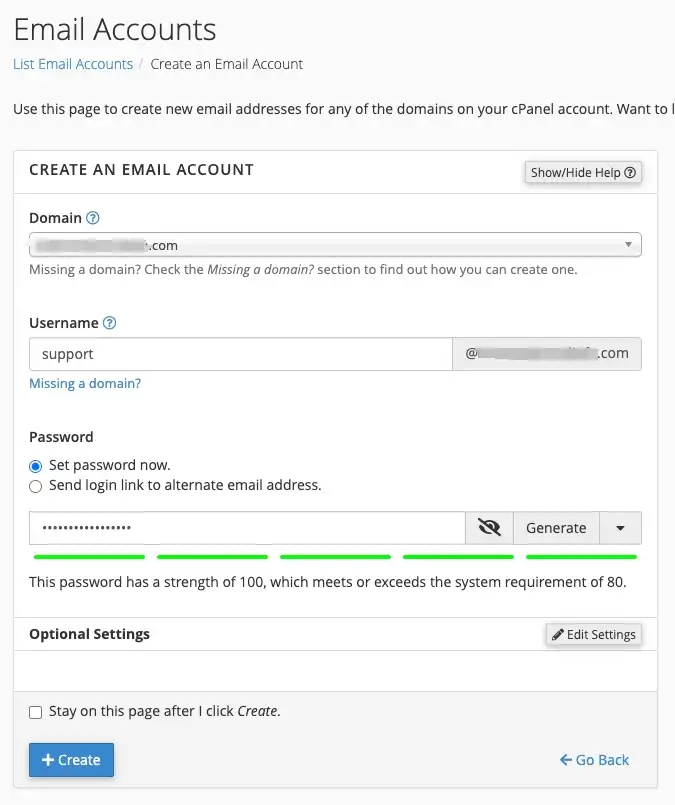
The new email account is successfully created.
At this point, there’s one final and critical step left: I still need to set up DNS records in Cloudflare before the email will work properly.
Note that the method below is something I figured out on my own. To be honest, I don’t fully understand the underlying mechanics, but based on my testing so far, this is the most stable and repeatable configuration I’ve found.
During the testing phase, I care more about stability than perfection.
Using this setup, my email can both send and receive messages normally, and I haven’t run into any spam issues.
A correctly functioning DNS setup should include two A records, two NS records, three MX records, and three TXT records.
The A records should be set up as follows:
| Type | Name | Content | Proxy Status | TTL |
|---|---|---|---|---|
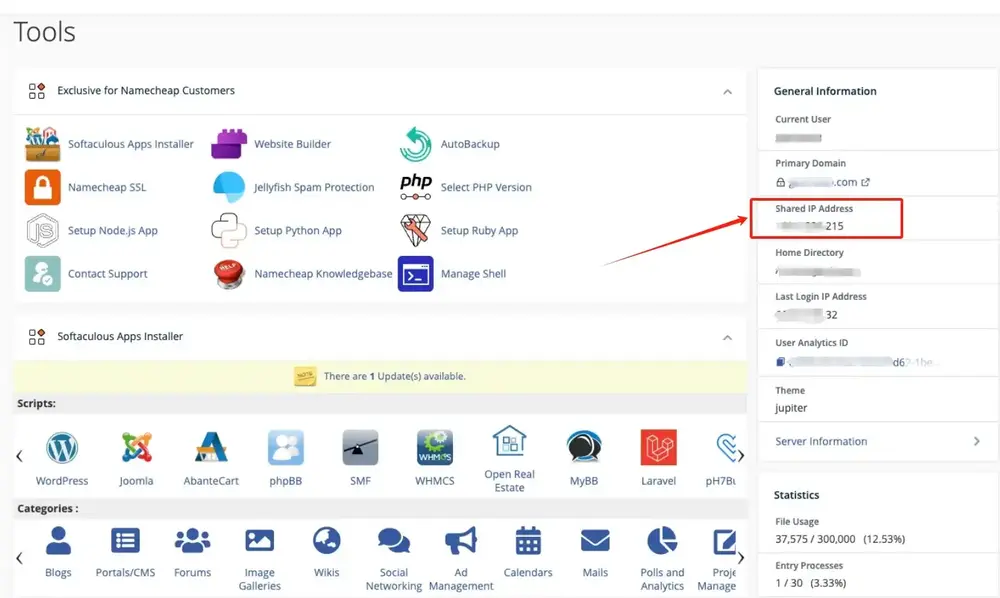
| A | Your domains (ex.www.123.com) | Shared IP Address | Proxied | Auto |
| A | www | Shared IP Address | Proxied | Auto |
The Shared IP Address can be found on the right-hand side of cPanel.
The NS records should be set up as follows:
| Type | Name | Content | Proxy Status | TTL |
|---|---|---|---|---|
| NS | Your domains (ex.www.123.com) | Nameservers from the domain registrar | DNS only | Auto |
| NS | Your domains (ex.www.123.com) | Nameservers from the domain registrar | DNS only | Auto |
The MX records should be set up as follows:
| Type | Name | Content | Proxy Status | TTL |
|---|---|---|---|---|
| MX | Your domains (ex.www.123.com) | mx1-hosting.jellyfish.systems Priority=5 | DNS only | Auto |
| MX | Your domains (ex.www.123.com) | mx2-hosting.jellyfish.systems Priority=10 | DNS only | Auto |
| MX | Your domains (ex.www.123.com) | mx3-hosting.jellyfish.systems Priority=20 | DNS only | Auto |
The TXT records should be set up as follows:
| Type | Name | Content | Proxy Status | TTL |
|---|---|---|---|---|
| TXT | Check cPanel → Email Deliverability | Check cPanel → Email Deliverability | DNS only | Auto |
| TXT | Check cPanel → Email Deliverability | Check cPanel → Email Deliverability | DNS only | Auto |
| TXT | Check cPanel → Email Deliverability | Check cPanel → Email Deliverability | DNS only | Auto |

After completing these settings, I test sending and receiving emails. If both work properly, then the domain email setup is good to go.
Step 5: Build the Landing Page
My goal is not to build a complete website. I only need a landing page that meets Google Ads requirements and can be created as quickly as possible. In addition to the landing page, there should be at least one Privacy Policy page to satisfy the minimum page requirements.
I usually use ChatGPT to put the page together. I simply tell it what I want, and it takes care of the layout and content for me. It’s my go-to builder for Google Ads landing pages.
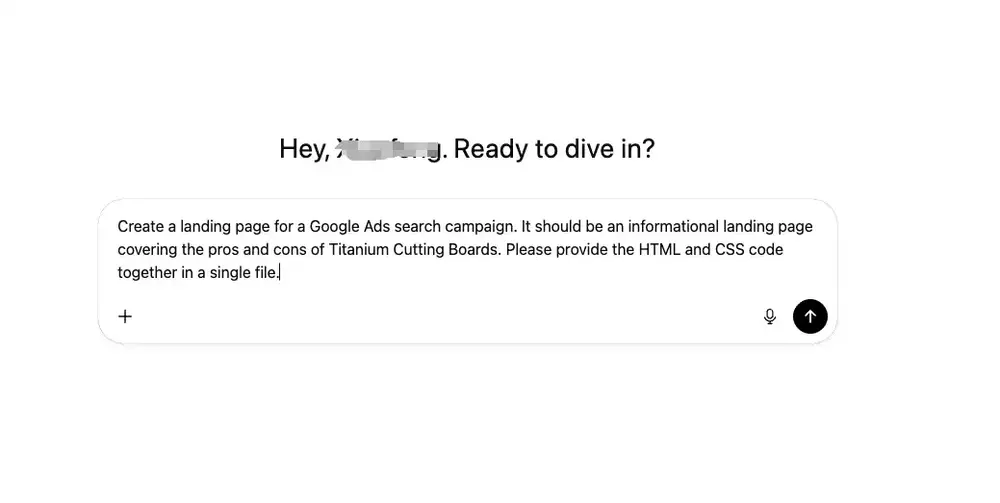
Then, I copy the generated HTML code into a text file and change the file extension to “.html.”
Of course, the page still needs to look good and feel well designed. I usually go back and forth with ChatGPT multiple times, refining it until I’m satisfied. I also use ChatGPT to design the logo for the landing page. I’ve compared several AIs—like Grok and Gemini—and for my taste, ChatGPT consistently produces the logos I like the most.
Once everything is ready, I upload the landing page and any related files to the public_html directory of the corresponding domain in cPanel’s File Manager. After that, I can access the landing page directly through the domain.
One more critical point: the landing page must meet Google’s compliance requirements. At a minimum, it should include pages like About Us or a Privacy Policy. I’m currently writing a separate article focused specifically on Google’s landing page compliance requirements, which I’ll share later.
When I’m building a landing page and the offer shows real profit potential, I recommend using WordPress instead. That way, the landing page can later be expanded into a full content site. I’ll also share an article on using WordPress to build a landing page for testing Google Ads and then scaling it into a content website.
Step 6: Set Up Analytics
During the testing phase, I don’t set up a full-fledged analytics system. I only care about whether the offer has real search traffic and whether users click or submit. Since my goal is just to form a quick testing SOP, simplicity and speed are my only requirements—I want to rapidly filter out useful offers.
So with GA4, I only do three things:
- Create a new GA4 Property.
- Insert the GA4 basic tracking code into the landing page.
- Confirm that page views are being recorded properly.
I don’t set up complex event tracking or conversion funnels. Those only come into play once I confirm the offer has potential. From my experience, chasing “perfect data” too early just slows down the testing process.
Step 7: Set Up the Campaign
The sole purpose of creating a campaign during testing is to verify whether the offer has sustainable search demand. I usually configure campaigns according to my testing goals, and I stick to the following fixed settings:
- Use Search Campaigns only.
- Target the U.S. and English language (of course, choose offers aimed at the U.S. market).
- Set only one keyword:the product keyword for the offer, or a full-match variant.
- Keep the ad copy non-aggressive, so the account doesn’t get restricted.You can check out my other article, which explains how I got my affiliate marketing landing page approved on Google Ads in 2026.
- Use ChatGPT to recommend a list of negative keywords to exclude.
From my first failed ad test, I learned that during the testing phase, the most important signal isn’t conversion rate. Being able to run the campaign stably without frequent Google Ads restrictions is already a win.
Testing Affiliate Offers with Google Ads SOP FAQs
I can confidently tell you that yes, you can. I’ve personally run experiments using Google Ads to promote affiliate offers, and you can check out my “Testing a Single-Page Affiliate Site on Google Ads” experiment for the process.
You do need to follow Google’s policies because in 2026 some offers or landing pages may not be allowed. In my experiments, I summarized 10 factors to ensure a Google search ad is compliant.
By following these guidelines when creating your landing page and setting up your campaigns, ads are more likely to get approved. You just need to pick affiliate offers that are likely to convert and test them with Google Ads to find profitable campaign combinations.
Final Thoughts
This is my own 7-step SOP for quickly setting up the conditions to test affiliate e-commerce offers with Google Ads. I’ve gotten pretty fast at it—each time I set it up, I can complete everything in under two hours. After that, I can launch a Google Ads campaign and quickly test the offer.